
Basics Pro LED Ceiling Fan
3ISLA52D
Sleek. Efficient. Timeless.
Luminous. Modern. Effortless.
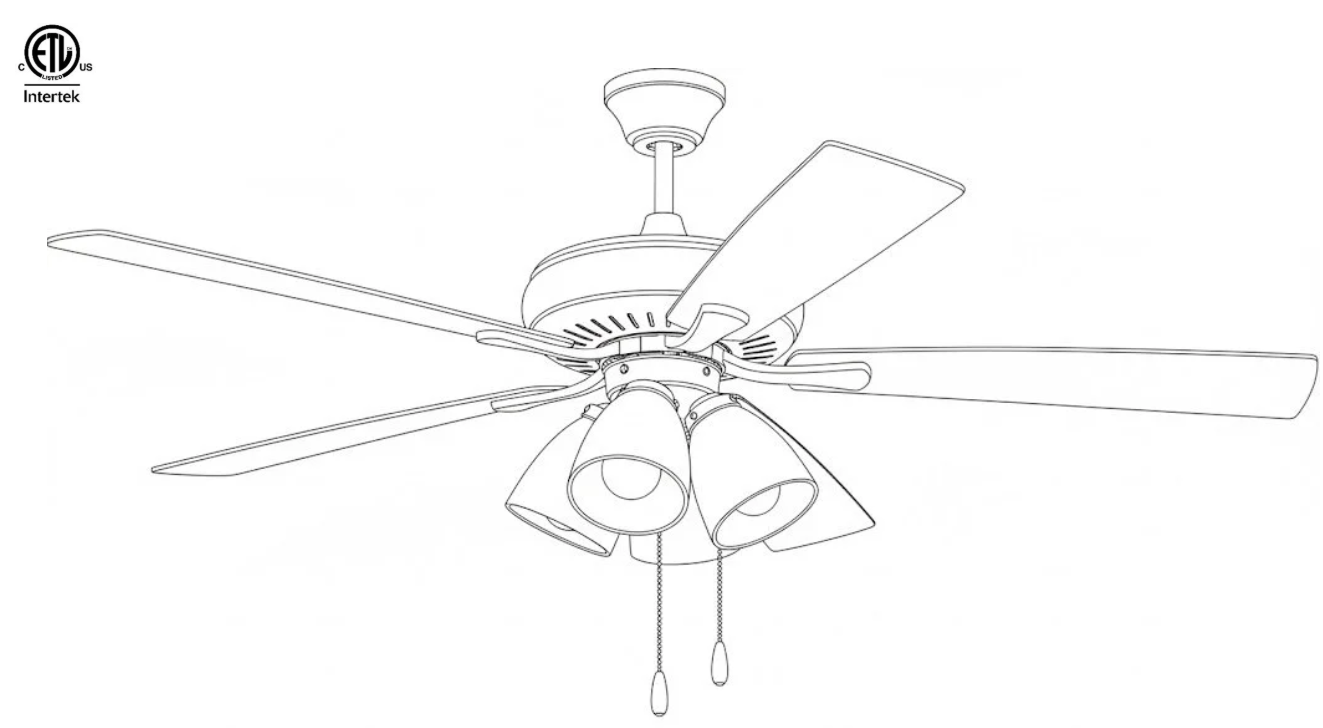
The Basics Pro blends the industrial chic of Brushed Nickel with the soft elegance of frosted glass. Designed to be a striking centerpiece, this 52-inch fan delivers whisper-quiet airflow and high-performance cooling to any contemporary living space.
Equipped with integrated LED technology, the Basics Pro provides energy-efficient illumination that is as clear as comforting. With its dual-mount versatility and reversible blades, it offers a perfect balance of functional engineering and sophisticated design.
The Basics Pro is not just a fan; it offers both utility and style.
See website for warranty & FCC information.
-
52" blade span. 12-degree blade pitch. 5-3/16" wide canopy.
It comes with four 4-watt standard-medium base E27 LED light bulbs.
Brushed nickel finish steel motor housing. Silver reversible fan blades.
Pull chain ceiling fan operation for easy control.
Basics Pro Premier ceiling fan from the Kichler brand.
-
CAUTIONS AND WARNINGS
WARNING: TO REDUCE THE RISK OF FIRE, ELECTRIC SHOCK, OR INJURY TO PERSONS, OBSERVE THE FOLLOWING READ AND SAVE THESE INSTRUCTIONS
Installation work and electrical wiring must be done by qualified person(s) in accordance with applicable codes and standards (ANSI/NFPA 70), including fire-rated construction. Use this unit only in the manner intended by the manufacturer. If you have any questions, contact the manufacturer. After making the wire connections, the wires should be spread apart with the grounded conductor and the equipment-grounding conductor on one side of the outlet box and ungrounded conductor on the other side of the outlet box. The splices, after being made, should be turned upward and pushed carefully up into the outlet box.
WARNING: Before you begin installing the fan, servicing or cleaning unit, Switch power off at Service panel and lock service disconnecting means to prevent power from being switched on accidentally. When the service disconnecting means cannot be locked, securely fasten a prominent warning device, such as a tag, to the service panel. Be cautious! Read all instructions and safety information before installing your new fan. Review the accompanying assembly diagrams. When cutting or drilling into wall or ceiling, do not damage electrical wiring and other hidden utilities. Make sure the installation site you choose allows the fan blades to rotate without any obstructions. Allow a minimum clearance of 7 feet from the floor to the trailing edge of the blade.
WARNING: To Reduce the Risk of Fire, Electric Shock, or Personal Injury, Mount to Outlet Box Marked “Acceptable for Fan Support of 15.9 kg (35 lbs) or less” And Use Mounting Screws Provided with The Outlet Box.
WARNING: To reduce the risk of personal injury, do not bend blade holders during installation to motor, balancing or during cleaning. Do not insert foreign objects between rotating blades.
CAUTION: For Compliance with Local Codes and Regulations, If Installing the Secondary Support Safety Cable in the U.S., Do Not Remove Knockouts in the Outlet Box. Mount the secondary support safety cable through the reserved nail/screw hole on the outlet box to the building structure (or the ceiling joist). Attach the mounting bracket using only the hardware supplied with the outlet box.
WARNING: To Reduce the Risk of Electric Shock, This Fan Must Be Installed With a general use, isolating Wall Control/Switch.
WARNING: To reduce the risk of fire or electric shock, this fan should only be used with fan speed control part no. BFR-G4F48D10G1 manufactured by Chungear Industrial Co. Ltd.
WARNING: To reduce the risk of fire or electric shock, do not use this fan with any other solid state fan speed control device, or variable speed control. If this unit is to be installed over a tub or shower, it must be marked as appropriate for the application. Never place a switch where it can be reached from a tub or shower. The combustion airflow needed for safe operation of fuel-burning equipment may be affected by this unit’s operation. Follow the heating equipment manufacturer’s guideline safety standards such as those published by the National Fire Protection Association (NFPA), and the American Society for Heating, Refrigeration and Air Conditioning Engineers (ASHRAE) and the local code authorities.
CAUTION: To Reduce the Risk of Electric Shock, Disconnect the electrical supply circuit to the fan before installing the light kit.
CAUTION: The light source is designed for this specific application and can overheat if serviced by untrained personnel. If any service is required, the product should be returned to an authorized service facility for examination or repair. All set screws must be checked, and re-tightened where necessary, before installation.
-
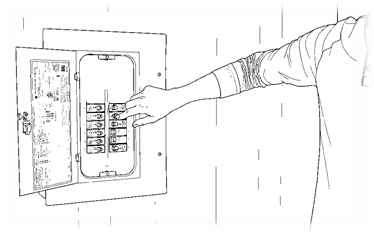
Turn power OFF at the service panel before beginning installation.
Lock the service disconnect to prevent accidental power-on.
If locking is not possible, attach a warning tag or other visible notice to the service panel.
-
Essential Hand Tools
Phillips Head Screwdriver
Flat-Head Screwdriver
Wire Strippers/Cutters
Pliers
Adjustable Wrench
Step Ladder
Safety & Testing
Non-Contact Voltage Tester
Electrical Tape
Safety Glasses
Helpful Extras
Tape Measure
A "Wiring Buddy" (Optional)
AAA Batteries
-
Before you start, open the box and ensure you have the following pieces that come with the fan:
Mounting Bracket & Canopy
Motor Assembly
5 Fan Blades (Brushed Nickel/Silver Reversible)
4 Integrated LED Light Kit & Frosted Glass Shades
Hardware Bag (Wire nuts, blade screws, and balancing kit)
Installation Instructions
-
Before you start, make sure your ceiling box is fan rated (it should say "Acceptable for Fan Support"). This fan weighs about 18 lbs., so a regular light fixture box won't hold it safely.
Turn off the power: Go to your breaker box and switch off the power to the room.
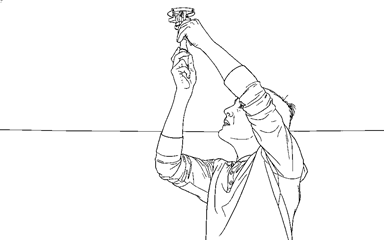
Double-check: Use a voltage tester at the ceiling to be 100% sure the wires aren't live.
Lock it down: Put a piece of tape over the wall switch and the breaker so no one accidentally turns the power back on while you’re holding the wires.
-
Step 1: Using the Phillips-Head screwdriver and screw, attach the mounting bracket into a fan-rated junction box. If your ceiling is sloped, this fan can handle an angle of up to 23 degrees, but you might need a longer downrod to make sure the blades don't hit the ceiling.
-
Step 2: Select a style.
Downrod Style: Slide the decorative canopy and the "yoke cover" onto the downrod. Thread the fan wires through the pipe, then secure the downrod to the top of the motor using the included pin and clip.
Or
Flush Mount Style: If you have low ceilings, skip the downrod and attach the canopy directly to the motor housing as described in your manual.
-
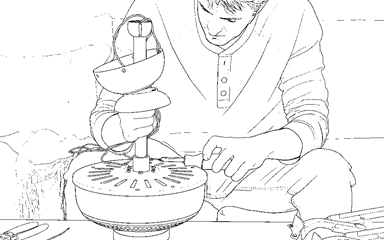
Step 3: Lift the motor assembly and hang it on the mounting bracket. Most Basic Pro fan models have a "ball and socket" joint that lets the fan hang freely so you can use both hands for the wiring.
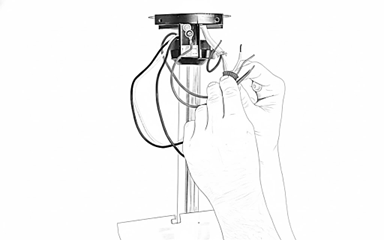
Step 4: Match the wire colors using the provided plastic wire nuts and connect the wires:
White to White (Neutral)
Black to Black (Power for the fan)
Blue (or Blue/Black stripe) to Black (Power for the LED lights)
Green or Bare Copper (Ground wire for safety)
Note: If you have two separate switches on your wall (one for the fan and one for the light), connect the fan's Black wire to one "hot" wall wire and the fan's Blue wire to the other "hot" wall wire.
Step 5: Tuck all wires neatly into the canopy and slide it up to cover the bracket, securing it with the decorative screws.
-
Step 6: The Basics Pro features 5 reversible blades (Brushed Nickel on one side and a wood-grain-like Greywood on the other).
Step 7: Choose your look and decide which side of the blade you want facing down.
Step 8: The "Start-then-Tighten" Trick: Put all the screws into one blade bracket before you tighten any of them. This keeps the blade from getting crooked.
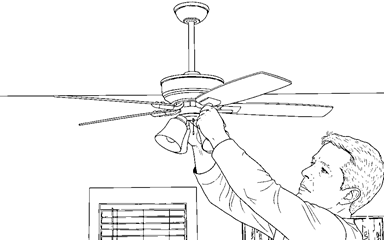
Step 9: Once the blades are on their arms, screw the arms into the motor.
Step 10: Connect the light kit to the motor using the quick-connect plug (it usually just clicks together) by plugging it in.
Step 11: Screw the included four E26 LED bulbs into the sockets and then attach the "Frost" glass globes over them. Be careful not to over-tighten the glass, as it can crack when it gets warm.
-
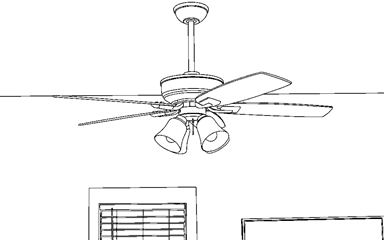
Step 12: Turn the power back on at the breaker.
Step 13: Use the pull chains to test the three speeds and the light.
Pro Tip: If the fan wobbles at high speed, check that the mounting bracket screws are tight. If it still wobbles, use the balancing kit that came in the box.